Friday, June 19, 2009

Daddy's Girls


A Father's Day layout that I did using My Mind's Eye's Pretty Please range of papers and Prima's Wildwood Collection flowers.


Wishing an early Father's Day to all the dads out there!


Materials used:
Patterned Papers - My Mind's Eye's Pretty Please Collection - Stripes, Full Of Flowers
Cardstock - Bazzill Basics
Flowers - Prima's Wildwood Collection
Lace Ribbon - Daiso
Metal Embellishments - Tim Holtz Idea-ology - Corners, Philosophy Tags
Title Alphas - Making Memories Great Escape Cork Alpha Stickers
Journal Stickers - 7Gypsies 97% Complete Stickers - Quotes, Remember; K & Company - Classic K Margo Quotes and Words Embossed Stickers, Classic K McKenna Embossed Stickers, Studio K Happy Hearts Grand Adhesions
Others - Tim Holtz Distress Ink in Frayed Burlap, and Aged Mahogany; EK Success 3D Foam Dots

Monday, June 15, 2009

A Love For All Seasons


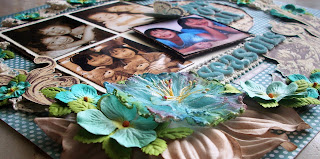
My latest layout for 52 Sketches ... 52 Weeks, for this week's Sketch #24. I used papers from Webster's Pages, a mixture of Prima flowers, and lots of lace!


I double matted the sepia coloured photos and then tilted the last coloured photo and popped it up with 3D foam dots for dimension and effects.


This week's awesome prize is a $50.00 gift certificate sponsored by Scrapbook Express - a WONDERFUL online store! Do check out the 52 Sketches blog for a link to the store.

And here's a look at the lovely sketch by Julie Bonner.


Materials used in my layout:
Patterned Paper - Webster's Pages, My Mind's Eye
Cardstock - Bazzill Basics
Flowers - Prima
Lace - Daiso
Title Alphas - American Crafts Thickers - Black Tie Velvet Letter Stickers
Journaling Stickers - 7Gypsies 97% Complete Stickers - Time
Others - Tim Holtz Distress Ink in Frayed Burlap, EK Success 3D Foam Dots


Tutorial - Hidden Journaling

This is the tutorial I did for 52 Sketches ... 52 Weeks, on 3 June .....


We often use journaling to make a note of the special events reflected in our layouts. However, sometimes, you may want to use hidden journaling instead. For instance, when you have a personal message which is not meant for everyone’s eyes, or you can use it to save space on a layout, especially if, like me, you like to use lots of embellishments on a layout but at the same time want to note down all the details of the layout or of the photos contained in the layout. Hidden journaling can also make the layout more interesting, with all the little hidden messages. This tutorial will show you some of the ways in which you can incorporate hidden journaling into your layout.

One method is to take a piece of cardstock or sturdy patterned paper and fold it in half, to form a mini card. I’ve used a cardstock for my layout.


You can then decorate the cover of the card with any embellishment you wish, to complement the layout.


On the inside of my card, I did some stamping and used journal rub-ons.


The card can then be pasted onto the layout and the cover held down using photo turns, or paper clips. Here’s a look at the finished layout using this method of hidden journaling. The four squares without the photos are the journaling cards, held down by photo turns.


Apart from these mini cards, you can also make little envelopes or pockets instead, and slide your journal card or even little mementoes into them.

Another almost similar method is to cut a large shape out of cardstock or patterned paper, and attach one side of it to your background paper. In this layout, I punched matching holes down one side of the “flap” and cardstock, and tied them together with ribbons.


I then attached my photos to the top piece (the “flap”) and embellished accordingly. I flipped open this top piece to include my journaling and more embellishments, and then held the open side down to the layout using two pieces of ribbons, one threaded through a punched hole at the open side of the “flap”, and another threaded through the backing cardstock next to this. Just make sure the punched holes are at the same levels. These two ribbons can then be tied together into a little bow.


Finally, there is the more popular method of just inserting a journal card (either bought or handmade) behind the photo. I would usually mat the photo to give it a firmer backing. When using this form of hidden journaling, you must remember to tape down only three sides of the photo or photo mat, leaving the centre portion unglued and leaving one side open to insert the journal card into.


Make sure the journal card is smaller than the photo or photo mat, giving allowance also to the three glued down sides, so it can slide in and out easily. Instead of taping down the photo or photo mat, you can also prop up the photo or photo mat with 3D glue dots for dimension if you like (again, remember to place the 3D dots only along three sides of the back of the photo or photo mat).

For the journal card, I would usually attach a “handle” by which you can easily pull the card out from behind the picture, although this need not be a must. When attaching a “handle” to the journaling card, make sure it is securely fastened to the card. I usually use strong glue dots, or for ribbons, you can also staple it to the edge of the card. Be mindful if you intend to use liquid craft glue to attach ribbons as it can sometimes be seen through the front of the card.

If using chipboards or flowers, make sure that you attach only the centre portion of the embellishment to the edge of the card, so that it can overlap over the photo when the card is slid in behind it.


Try sliding the card behind the photo first, and then place the embellishment over it to gauge where you should place your glue dots.


Below, I’ve actually extended my homemade card behind the chipboard piece, cutting it according to the shape of the chipboard, for a more secure hold.


There are many items of embellishments you can use for your “handle”, and you can even use a combination of embellishments. The following are some examples.

Using a ribbon or lace as the “handle”:


Using a piece of embellished chipboard:


Using flowers:


Using a paper clip:


Using a piece of patterned paper cut-out:


Or, you can just slide the journaling tag behind another piece of card:


Notice there are no “handles” attached to the journaling tag in this last one, and I’ve also taped down only two sides of the front card, as both cards are almost similar in size.

Whichever method you use for your hidden journaling, or whichever embellishment you choose to use as your “handle”, the trick is for it to blend in seamlessly with the rest of the layout. As you can see from my layouts, I often create my own journaling cards, using the same patterned papers and embellishments as the layout.

So there you go! I hope this has given you some ideas on incorporating hidden journaling into your layouts. I’d love to see what you come up with!

Thursday, June 11, 2009

All Of Us Together


A lift of a gorgeous layout by Gabrielle Pollacco. I love all the distressing she did with the papers!

The photo is of my younger DD and her kindergarten friends playing in the Nanyang Girls High School field after a National Day mini-concert they put up when they were in K2.


Materials used:
Patterned Papers - 7Gypsies Gypsy Market Paper Collection - Rye, Herne; Basic Grey Porcelain Collection - Chantilly; DCWV La Creme Paper Stack
Cardstock - Bazzill Basics in Black
Clock - Maya Road
Letter Stickers - Making Memories Tiny Alphas - Brown Ledger; Provo Craft Halfabitties - Rat-a-tat Half-a-bitty, Licorice Half-a-bitties
Chipboard Wings - Fancy Pants The Daily Grind Printed Chipboard Shapes
Chipboard Heart - MAMBI Soft Spoken Chipboard Stickers - Cornucopia - Family
"All Of Us" Chipboard - MAMBI Soft Spoken Chipboard Stickers - Cornucopia - Family
Brads - Basic Grey Bittersweet Collection; K & Company Wild Saffron Metal Art Fabric Brads
Gems - Prima Say It In Crystals in Red
Flowers - Prima
Lace - Prima
Safety Pin - Tim Holtz Idea-ology Trinket Pins
Others - Tim Holtz Distress Ink in Black Soot, and Aged Mahogany; Gauze; American Crafts Slick Writer in Black Fine


Sunday, June 7, 2009

Livin' Out Loud


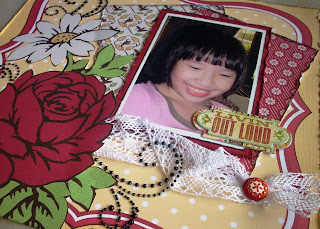
I've just today completed this layout using Jenni Bowlin Studio papers. I so love the colours of these papers!


Materials used:
Patterned Papers - Jenni Bowlin Studio - Front Porch Die-Cut Label Paper, Tweet Tweet, Oilcloth, and Red Circle Flower
Cardstocks - Bazzill Basics
Flourishes - Prima Say It In Pearls, Prima Say It In Crystals
Title Chipboard - K & Co Wild Raspberry Words & Buttons Adhesive Chipboard
Brad - K & Co Wild Saffron Metal Art Fabric Brads
Others - Tim Holtz Distress Ink in Black Soot, Lace


Thursday, June 4, 2009

Dream


This layout was inspired by a lovely layout by Robbie Herring. What attracted me about her layout was the many details and use of embellishments, so I decided to adapt them to suit my photo and style. I like how it turned out, even though I have to admit green is not a colour I'm used to scrapping with.


I used mainly papers from Making Memories' Greenhouse Paperie range (I especially love the Flocked Floral paper) and added in some cut-outs from 7Gypsies' Gypsy Market: Blaze paper. And I chose a lot of brown-toned embellishments to contrast against the greens.


I also liked Robbie's use of the Hambly frame as a journaling tag, so I decided to do the same.


Materials used:
Patterned Papers - Making Memories Greenhouse Paperie Collection - Varnished Vine, Flocked Floral, Geometric Window, Skinny Stripe; 7Gypsies Gypsy Market Paper Collection - Blaze
Cardstock - Bazzill Basics
Transparency - Hambly Screen Prints - Urban Chic Frames
Flowers - Prima Artistry and Woodstock Flowers
Title Alphas - American Crafts Thickers - Platforms Chipboard Letter Stickers in Brown
Letter Stickers - Toga Alphabet Stickers - Vanilla/Chocolate
Butterfly - Kaiser Wood Flourishes - Butterflies
Ribbon - Fancy Pants Fancy Free Collection - Free Spirit
Chipboard - Fancy Pants The Daily Grind Printed Chipboard Shapes
Eyelets - We R Memory Keepers
Rub-Ons - MME Laundry Line "Sundress" Rub-Ons - Life, Sweetness
Stickers - 7 Gypsies 97% Complete Stickers - Unique, Time; Heidi Grace Dimensional Words Stickers - Forever Love
Others - Ranger Distress Crackle Paint in Vintage Photo, Tim Holtz Distress Ink in Frayed Burlap


52 Sketches Tutorial

Well, I just did my very first tutorial, and it's for 52 Sketches 52 Weeks. I had lots of fun putting it together, so do go check it out HERE.